USERONBOARD01 — Onboarding Process for Individual Users
Last updated: September 22, 2026
Learn how individual users complete registration, verify identity requirements (KYC), and set up personal accounts on the Xtrm platform to receive payments.
Overview
When a company or partner issues a payment to an individual, Xtrm automatically creates or connects a personal account for the recipient. To access, manage, and withdraw funds, individual users must complete a quick onboarding process to verify their identity and ensure full financial compliance.
Want to see how this works in real-time? Use the interactive demo below to click through the steps before reading the full guide.
Automatic Account Creation Upon First Payment
When a payment is initiated through the API, user interface, or by mass payment file submission, and the recipient does not yet have an account, their account will be created automatically during the payment process.
First-Time Payment Account Setup Flow
When a user without an existing Xtrm account receives their first payment via API, user interface, or mass payment file, they will undergo a guided setup process to establish their account. This process ensures they can access their payment securely and smoothly.
The Onboarding Steps
1. Payment Initiation
The remitter sends the payment to the user through Xtrm.
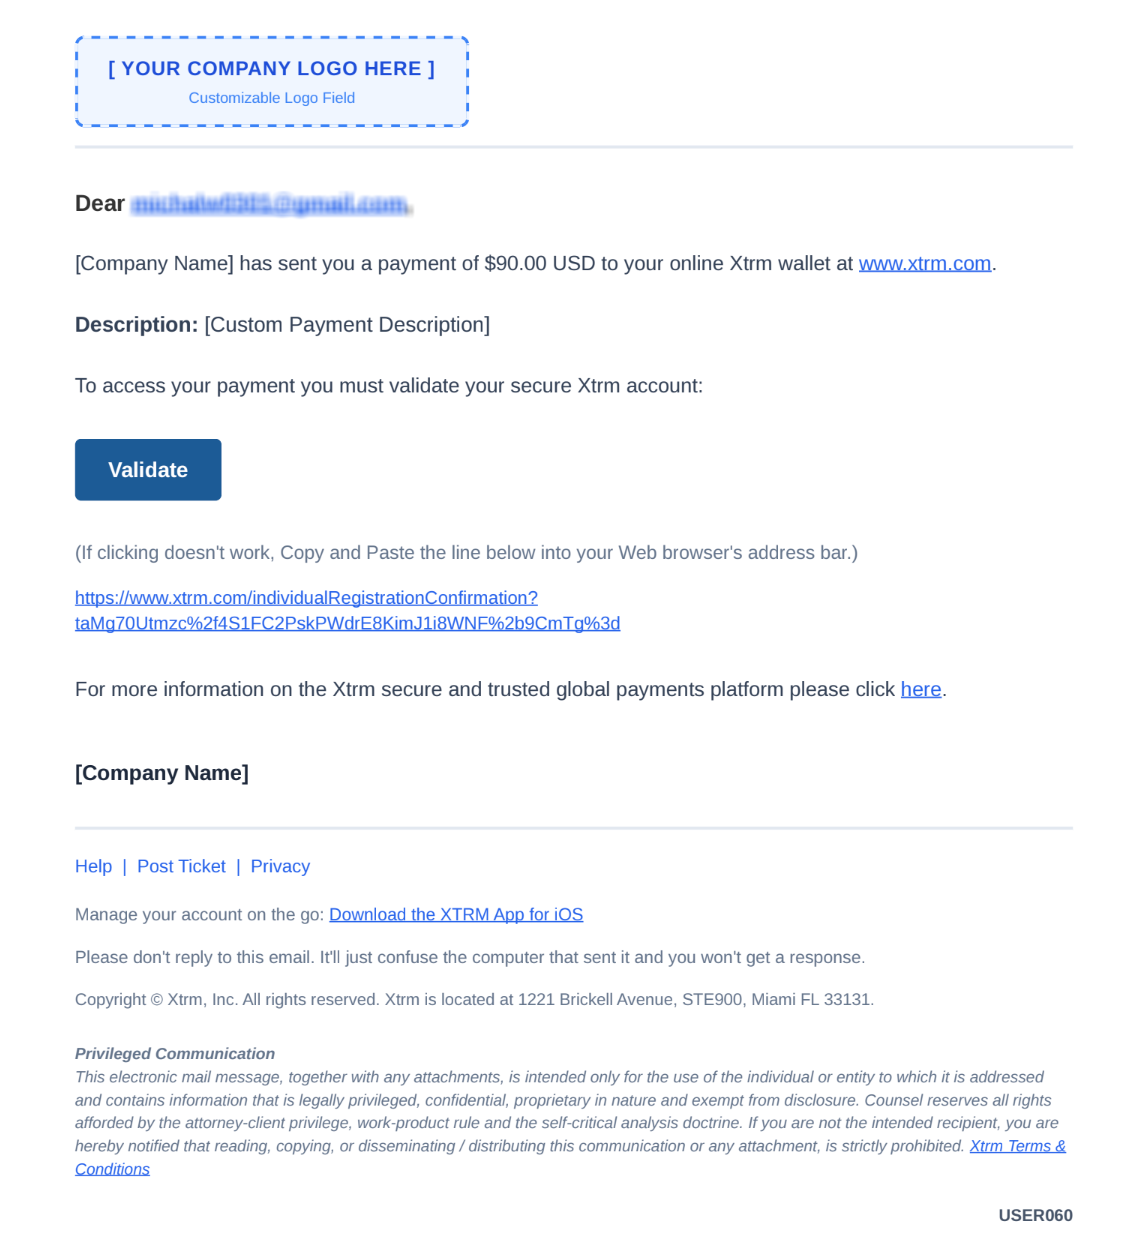
2. Welcome Email Notification
The user receives an email from Xtrm, notifying them of the incoming payment. This email includes the sending company’s logo, as taken from the company’s profile on Xtrm. Where it states "
>," the name of the sending company will appear.
3. Validate Account
The user clicks the "Validate" button in the email.
4. Accept Service Agreement
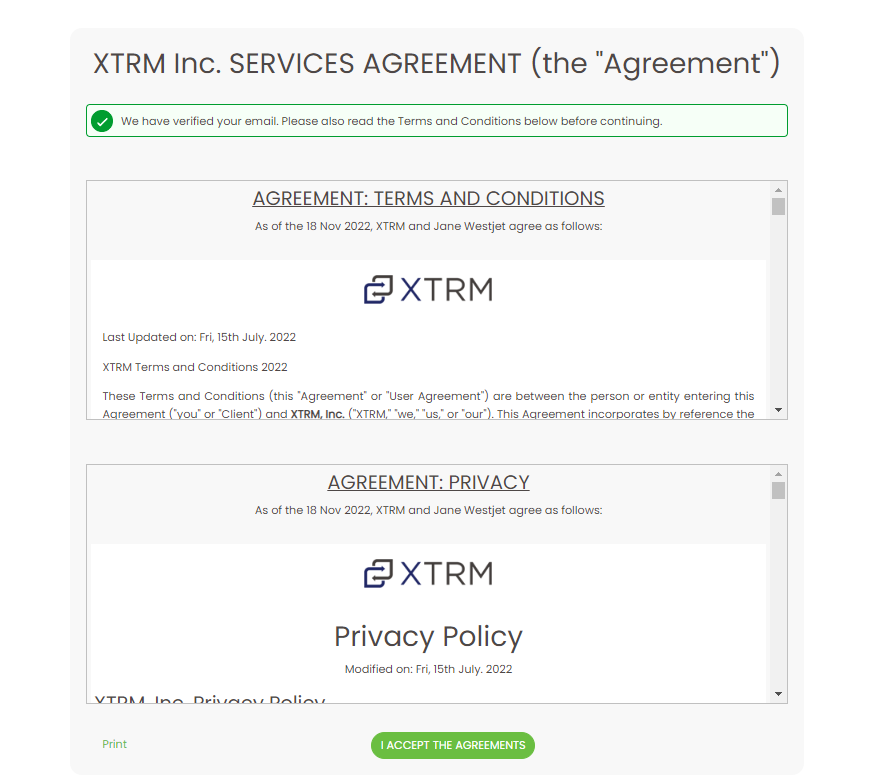
After reviewing and accepting the Service Agreement, the user proceeds to the account setup.
Troubleshooting: If the "I ACCEPT THE AGREEMENTS" button is not visible
If the button does not appear on the Terms & Conditions page, try these steps in order:
Switch to a desktop browser if you opened the validation email on mobile.
Try a different browser; Chrome or Edge work best.
Disable any ad blockers for the xtrm.com domain.
Click the "Validate" link again from the original email.
Scroll to the bottom of the agreement page; the button should appear there.
5. Account Setup
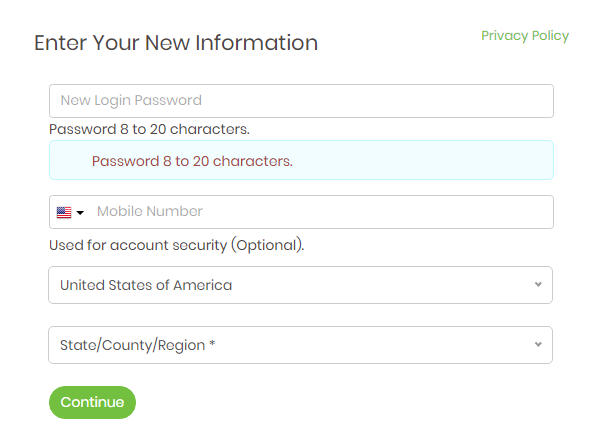
The user is prompted to:
Set a password
Enter their mobile number (used for security)
Specify their country and state/county/region
6. Complete Registration
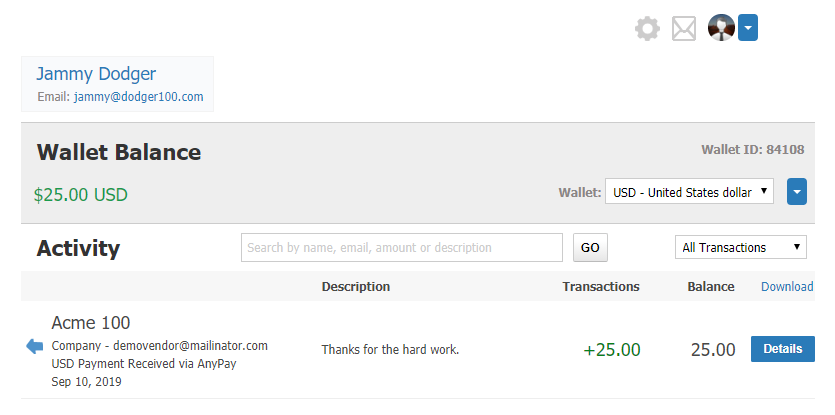
Upon clicking "Continue," the registration process is completed. The user is automatically logged into their new XTRM account and can view the payment in their wallet.
7.
Transfer Options
The user can then choose how to transfer their funds from the wallet, with options including:
Check (available in the USA only) — physical paper checks can take up to 10 business days to arrive
This straightforward process provides secure access to payments and flexible transfer options for the user.