Overview
XTRM provides your organization with unique Funding Bank Details that allow you to transfer funds directly into your XTRM wallets via Wire Transfer or EFT (e.g., ACH). These details include routing numbers, account numbers (IBAN or local), and are associated with the currency you’re funding.
Your organization can set currency-specific default wallets, ensuring streamlined and accurate wallet funding when payments are received.
To fund via Funding Bank Accounts, your organization must complete the Advanced Services Application and receive approval. This includes:
Completing the Advanced Services Profile
Undergoing Remitter Onboarding
Receiving confirmation of approval from XTRM
Only after approval will your funding bank details be fully enabled. For more detailed instructions please refer to Remitter Onboarding and Completing Advanced Services Profile.
You can configure a currency-specific default wallet to be automatically funded when money is received into your funding bank account. This wallet will be credited by default unless a different wallet ID is specified in the payment data submitted via mass pay files or the API.
Where to View Your Funding Bank Details
You can find your organization’s Funding Bank Details in two locations:
- Home Page – A summary is shown at the top of the page for quick reference.
- Fund Section – For full details, including all banking instructions, follow these steps:

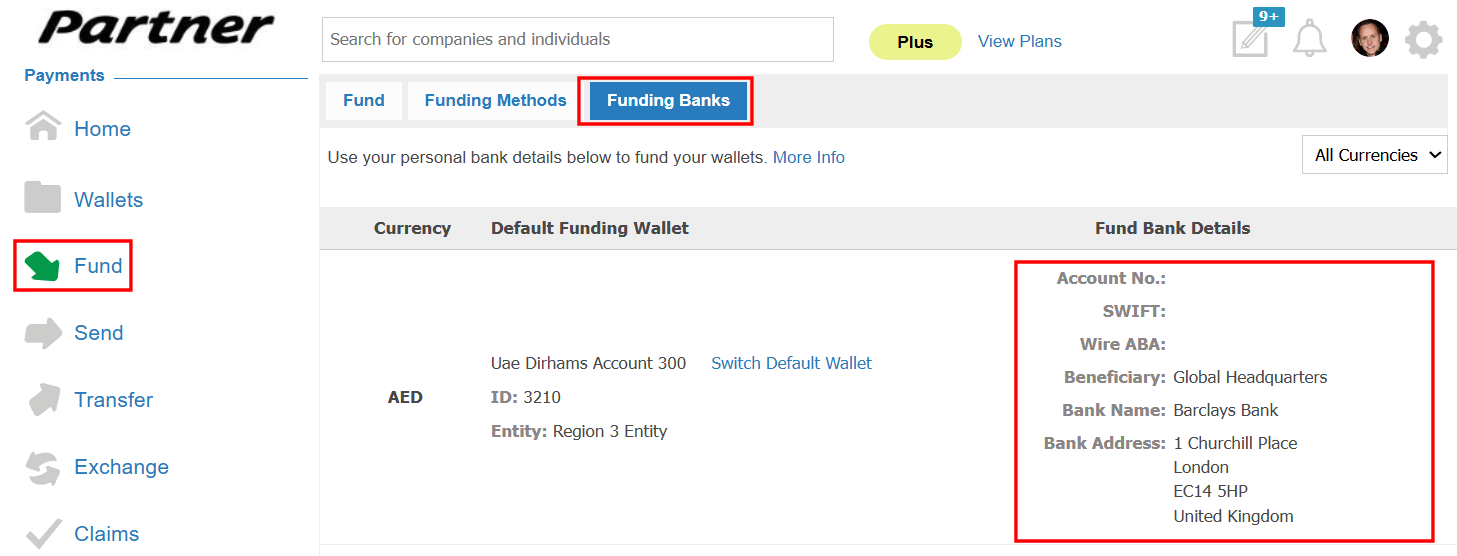
To View Your Unique Funding Bank Information:
- Navigate to Fund in the left-hand menu.
- Select Funding Banks.
- Use the bank details shown to initiate a Wire Transfer or EFT (e.g., ACH) from your business bank account.
Setting a Currency-Specific Default Funding Wallet
You can assign a default wallet for each supported currency. This wallet will automatically receive funds unless another wallet ID is explicitly provided in API calls or mass payment files.
Note: Only one default wallet per currency is allowed.
To Set a Default Funding Wallet:
Navigate to Wallets from the left-hand menu.
Locate the wallet you want to designate.
Click Edit.
Note: You’ll know which wallet is currently set as default by the green checkmark in the Default column on the Wallets screen.

4. Set Default Funding Wallet to Yes and proceed to click Done.

Was this article helpful?
That’s Great!
Thank you for your feedback
Sorry! We couldn't be helpful
Thank you for your feedback
Feedback sent
We appreciate your effort and will try to fix the article